
Key Takeaways
-
Gather essential tools like a cordless drill, screwdriver, and safety gear before starting your installation. This preparation ensures a smooth and safe process.
-
Choose high-quality magnetic track components and ensure compatibility with your lighting fixtures. This step guarantees a professional finish and optimal performance.
-
Adjust the positioning of your lights to achieve the best illumination. Experiment with different layouts to customize the lighting effect in your space.
Tools and Materials for LED Magnetic Diffused Linear Light Installation
Essential Tools and Safety Gear
You need the right tools to mount LED magnetic diffused linear lights safely and efficiently. Gather a cordless drill, screwdriver set, measuring tape, level, and wire stripper. Use a pencil to mark positions. Safety gear is important. Wear safety glasses and gloves to protect yourself during installation. Choose essential tools that fit comfortably in your hand. You can find many guides online that show images of each tool. These visuals help you identify the correct tools before you begin.
Magnetic Track Light Components
Select high-quality magnetic track rails for your project. You will need connectors, end caps, and mounting brackets. Make sure the rails match the length of your installation area. Check that the power supply is compatible with your lighting fixtures. Many kits include images of the components, which help you confirm you have all the necessary materials. Use a table to organize your materials and track light components:
|
Component |
Purpose |
|---|---|
|
Magnetic Track Rail |
Holds lighting fixtures |
|
Connectors |
Joins track sections |
|
End Caps |
Finishes track ends |
|
Mounting Brackets |
Secures track to surface |
|
Power Supply |
Powers the system |
LED Channel and Diffuser Options
Choose LED channels that fit your magnetic track system. Select diffusers that provide even light distribution. Frosted diffusers reduce glare and create a soft glow. Clear diffusers offer brighter illumination. You can view product images online to compare channel and diffuser styles. Always check that your materials are compatible with your lighting fixtures. This step ensures a smooth installation and a professional finish.
Tip: Lay out all tools and materials before starting. This preparation saves time and prevents mistakes.
Installation of Magnetic Track Lighting
Preparing the Mounting Area
Start your installation preparation by reviewing your layout. Measure the ceiling or wall where you plan to install the magnetic track light system. Mark the positions for each magnetic track rail using a pencil and level. This step ensures your layout remains straight and visually appealing. Remove any dust or debris from the surface to help the mounting brackets adhere securely. Check for obstructions such as pipes or wiring behind the mounting area. You should always perform safety checks before drilling. If you plan to install multiple magnetic track lighting systems, sketch your layout on paper. This visual guide helps you avoid mistakes during installation.
Tip: Take a photo of your marked layout. This reference can help you if you need to reposition any magnetic track light later.
Securing Magnetic Track Rails
Begin by attaching the mounting brackets to the marked positions. Use a cordless drill to secure each bracket firmly. Double-check the alignment with your level. Slide the magnetic track rail onto the brackets. Make sure each rail clicks into place. For longer installations, connect multiple rails using the provided connectors. Install end caps to finish the ends of each magnetic track light rail. This step prevents dust from entering the system and gives your installation a clean look.
Magnetic track lighting systems use 48V DC rails. This voltage enhances safety, especially in homes with children or pets. The low voltage also improves energy efficiency and reduces energy consumption. You should always follow wiring and connection rules provided by the manufacturer. This practice ensures your installation meets safety standards.
Attaching LED Magnetic Diffused Linear Lights
Snap each LED magnetic diffused linear light fixture onto the rail. The magnetic design allows you to reposition fixtures easily. Place adjustable spotlights where you want to highlight artwork or architectural features. Use LED channels for a continuous line of light. This approach creates uniform illumination, which works well in rooms with varying ceiling heights. The flexibility of magnetic track lighting lets you change your layout without tools.
Note: Adjustable spotlights can enhance the overall lighting effect. You can direct light exactly where you need it.
Check that each driver fits securely in the rail. The driver regulates power and ensures optimal efficiency. If your magnetic track light system includes modular fixtures, experiment with different arrangements. This flexibility allows you to customize your lighting for any space.
Connecting Power and Testing Lighting
Locate the power supply input on your magnetic track lighting system. Connect the driver to the 48V DC power source. Follow the wiring diagram provided by the manufacturer. Use a wire stripper to prepare the wires. Secure each connection with wire nuts or terminal blocks. Double-check all wiring before turning on the power.
Test the magnetic track light system by switching on the power. Inspect each fixture for proper operation. If a fixture does not light up, check the wiring and driver connections. Make sure all components fit securely in the rail. Test adjustable spotlights and reposition them as needed. This step ensures you achieve the desired lighting effect.
Safety Alert: Always turn off the main power before working on wiring. If you feel unsure about any wiring step, consult a licensed electrician.
A well-installed magnetic track lighting system maximizes energy efficiency and lighting performance. The modular design and low voltage driver system make future adjustments easy. You can add or remove fixtures without changing the wiring layout. This feature saves time and energy in the long run.
Tip: Take a final photo of your completed installation. This image can help you troubleshoot or expand your magnetic track lighting system in the future.

Finishing Touches and Lighting Adjustments
Checking Alignment and Operation
After you complete the installation, check the alignment of each light fixture. Use your level to confirm that the magnetic track runs straight along the ceiling or wall. Inspect each light for secure attachment to the track. Turn on the lighting system and perform post installation testing. Walk around the room and observe how the lighting interacts with your space. Look for any dark spots or uneven light distribution. If you notice flickering or dimming, check the connections and repeat post installation testing to ensure every light operates at full brightness.
Tip: Take a step back and view the lighting from different angles. This approach helps you spot misalignments or shadows that may affect the overall lighting effect.
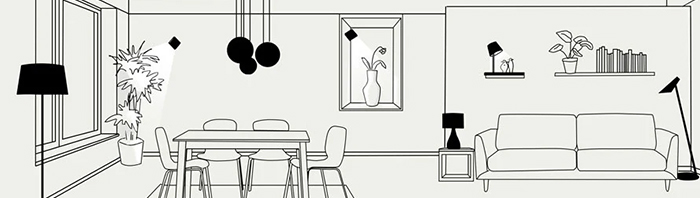
Adjusting Magnetic Track Light Positioning
You can easily reposition each light to achieve the best lighting for your room. For optimal illumination, consider these points:
-
Place the track closer to objects you want to highlight for dramatic accent lighting.
-
Increase the distance between the track and objects for broader ambient lighting coverage.
-
Space fixtures based on beam angle and intensity. Overlapping beams create smooth, even lighting, while wider spacing produces distinct pools of light.
-
Adapt the layout to your room’s shape and function. Flexible track configurations allow for easy customization.
Experiment with different positions to find the perfect balance between ambient and accent lighting. This process gives you full control over the customization of your lighting design.
Tidying Up and Enhancing Lighting Aesthetics
Once you finish adjusting the lights, tidy up the installation area. Remove any dust, packaging, or unused materials. Wipe down the tracks and fixtures for a clean, professional look. Install diffusers to soften the light and reduce glare. Frosted diffusers create a seamless finish and enhance the aesthetics of your lighting system. You can also use diffusers to blend the light for a more uniform appearance. This final step ensures your lighting not only functions well but also elevates the style of your space.
Note: High-quality images of your finished lighting setup can showcase your successful installation and inspire future customization projects.
You can install LED magnetic diffused linear lights at home with ease and confidence. These lights offer flexibility for your space:
-
Multiple installation methods, such as suspended, recessed, and surface-mounted.
-
Custom layouts, including continuous S-shaped patterns.
-
Adaptation for different room functions.
Always prioritize safety. Check safety before, during, and after installation. Review safety guidelines for each tool. Wear safety gear. Confirm safety when handling wires. Inspect safety for mounting brackets. Test safety after connecting power. Adjust lights with safety in mind. Clean up with safety as your focus. If you feel unsure, consult a professional for safety. Enjoy your new lighting and experiment with configurations while keeping safety first.
FAQ
How do you clean LED magnetic diffused linear lights?
You can use a soft, dry cloth to wipe the surface. Avoid water or harsh chemicals. Regular cleaning keeps your fixtures bright and dust-free.
Can you cut magnetic track rails to fit your space?
Yes, you can cut most magnetic track rails with a hacksaw. Always measure carefully. Use a file to smooth rough edges after cutting.
Do you need a professional for installation?
You can complete most installations yourself. For complex wiring or large projects, you should consult a licensed electrician for safety and compliance.


 IPv6 network supported